Crafty: Decorate your own Cupcake kits

20170619_085352

Hi there!!

I thought I would share my most recent gift bag project. This one was a decorate your own cupcake kit. Which should totally read as “load the kidlets full of sugar kit”. Hahahahahahahahahaha 

What you’ll need is:

Cupcake (make or buy, but be sure enough frosting to get a good hold on all the decorations)

Cupcake box, I used these: http://www.hobbylobby.com/Party-Baking/Baking-Supplies/Cupcakes-Stands/Pink-Blue-Green-Dots-Single-Cupcake-Boxes/p/54209

Mini loaf pans as trays: I used these http://www.hobbylobby.com/Party-Baking/Baking-Supplies/Cupcakes-Stands/Polka-Dot-Mini-Loaf-Baking-Cups/p/80793035

Crack dealer bags- ok, so they AREN’T called this in the stores. I don’t know how they’d sell if they called em that. But, that’s beside the point. Here’s the ones at Hobby Lobby: http://www.hobbylobby.com/Beads-Jewelry/Storage-Organization/Organizers/Clear-Self-Sealing-Plastic-Storage-Bags/p/JL85262

Treat bags: http://www.hobbylobby.com/Party-Baking/Party-Supplies/Treat-Bags-Containers/Large-Clear-Treat-Bags/p/45932

Shred: I chopped it up small enough to make a huge mess, but, you don’t have to chop it: http://www.hobbylobby.com/Party-Baking/Gift-Wrap/Tissue-Paper-Fillers/Lime-Green-Mylar-Gift-Shred/p/53064

Random (or theme it up, I am not telling you how to run your life) sprinkles, candies, jimmies, nonpareils, sparkling sugar, cake glitter…etc

I hauled out some of my stash:

20170619_075910

Misc: Scissors, ribbon, clear tape

Assemble the cupcake box and place cupcake inside. Congrats! You are halfway done. Take a break, enjoy a nice cuppa coffee and spend an hour on YouTube.

Take as many crack dealer bags in as many sizes as you have/wish, and fill them with the cake decorations…here’s mine looking like a dope deal for Rainbow Brite:

20170619_075738

Chop up shred (this will make a huge mess-both while packing and hopefully while unpacking) and place in the loaf pan. Place the loaf pan full of shred into the treat bag fill the loaf pan full of shred with the bagged sprinkles/decorations. Tie the bag with a ribbon. Tape the bag to the top of the cupcake box. Sit back and admire your ribbon bow work. Have another cuppa.

Hand the goody bags off to the kids as they head off to Dad’s/Grandma’s/camp for the week. Hey, there’s plenty of sugar in this to last that whole time!

Tell them they get bonus points if they can decorate their cakes during the car ride.

Here’s a quick vid showing the process and anything that I may have forgotten in this blog post:


Happy crafting!

Melissa

Shop with me at:

http://www.stampinup.net/esuite/home/melissaengeseth/

and if you are interested in Paper Pumpkin:

https://www.paperpumpkin.com/en-us/sign-up?demoid=2164821


Visit my Facebook page at:

https://www.facebook.com/PineconeCrafter

Or, visit my YouTube Channel:

https://www.youtube.com/user/mrsengeseth


Camper Project: Drop Down Table


camper folding table.jpg

You guys! I had an idea and it actually came out the way I had planned. I honestly can’t believe it. Things don’t often work out for me like that. There’s usually at least a bajillion hiccups along the way. But this idea came together so easy. And the best? I made and installed it myself!! And… It’s even level. And (lots of “ands” here)… the main part was FREE!

So, this table idea was in response to the need to have someplace to comfortably write (type) while in the camper. Almost like a desk area, a quick night stand for the sleeping area area near it, and extra counter space when needed. But, the more I thought about it, a table wouldn’t work because 1. finding one the perfect size was going to be difficult. 2. it needed to store away easy.  3. I needed to like it. And, 4. it needed to be crazy cheap.

So, off to Home depot I went. I picked up what I thought would be enough…two table legs: http://www.homedepot.com/p/28-in-Traditional-Table-Leg-2428/100392207 , trim: http://www.homedepot.com/p/House-of-Fara-3-8-in-x-3-4-in-x-8-ft-Basswood-Embossed-Vine-Moulding-691/100058349  and a 30 inch hinge. It’s called a continuous hinge or sometimes a piano hinge. Just needed one: http://www.homedepot.com/p/Everbilt-1-1-2-in-x-30-in-Bright-Nickel-Continuous-Hinge-15175/202034057 . From there I went to where the lumber is cut and pawed around in the scrap pieces and found a piece that I thought would work. Turns out it was a piece of melamine that was supposed to be the upright sides to a shelving unit. I had the guy there cut it to 32 inches long and he marked the price for me…FREE! They were going to junk it! Woot!!! I can do free!! Here’s what it was: http://www.homedepot.com/p/Melamine-White-Drilled-Panel-Common-3-4-in-x-15-3-4-in-x-8-ft-Actual-0-75-in-x-15-75-in-x-97-in-371693/202089062 . So the grand total from the Home Depot shopping was right around $31.00

On the way home I stopped at Walmart, but, they didn’t have what I needed. Gasp, whaaaaat? Yeah, really. I needed a dowel and all I could find were round ones. I needed a square one. I could have gotten one from Home Depot, but, I knew I could do better on the price, and I could have shorter more manageable pieces elsewhere…and I could drool over the crafty supplies…at Hobby Lobby. So, as it’s on my way home, I stopped there, touched all the yarn, smelled all the candles, and grabbed two sticks of this: http://www.hobbylobby.com/Crafts-Hobbies/Wood-Crafting/Unfinished-Wood/1%22-Hardwood-Square-Dowel/p/21685 so easy. I used a coupon for 40% off and my daughter used her coupon for a stick. So we got each stick for 40% off. Nice.

I took all this home and began painting all of it. The table itself I painted gray, the legs and dowels (once cut to shape) espresso, and the trim copper (all left over colors I have used in previous projects) . I wanted it to fit in the color scheme, but, be a little funky, too.


Once all the pieces were painted the fun began. I needed to make two collars to support the legs and help to guide the legs to where the little screw on top of the legs would fit into the underside of the table. To make the collars, I cut the square dowels into a hexagon shape. Each cut was 22.5 degrees. Here’s the math. A circle is 360 degrees, we needed the circle to have eight sides, so cut the circle into eight sides, which equals eight 45 degree segments. Ok. Good. Now, each segment will have two cuts (one at each end), so 45 divided by 2 is 22.5. Each cut needed to be 22.5 degrees. No problem. Most miter saws have that pre-measured on it’s cut guides. No problem. I measured the width of each of the sides of the legs to decide how wide the inside of my hexagon collar segments would be and determined that about 1 inch would work well and give me a little wiggle room. So, I cut, and cut, and cut.

Here’s all the pieces,


and here’s all the pieces together.

KODAK Digital Still Camera

This wood glue = awesome. Just saying. It sets up crazy fast and strong. So be sure that’s where you want your pieces. I think short of a jackhammer, these aren’t coming apart again.

And then I painted them with espresso colored spray paint and let them dry. Once dry, I flipped the table top over and placed them where I wanted them to be, close to the edge on one long side but with about an eighth inch set back from the edges. I marked where I wanted them with a Sharpie and then glued them down. Let that dry and we were ready for the next step.

20170610_155054

Because my cuts weren’t EXACTLY perfect, finding the middle might not be so easy. But, that’s ok, I had a plan. I took some old craft paint and put a drop on the screw of the table leg. I centered the leg in the collar and pressed the screw against the wood in the center of the collar. That’s where I’d need to drill a recess for the screw to slide into.


Voila, it worked.

Drilling the holes was easy. First measure the length of the screw, take that measurement and add an eighth of an inch more. Transfer that measurement to the drill bit. Mark it on the bit and then add a bit of painters tape to the bit. When you drill into the wood, watch for when the tape meets up with the wood. Perfect depth each time.


See? I have to drill the hole a little deeper here.

Using the miter saw again, I added the trim to the table so it was finished. Easy peasy.

Next was the attachment of the hinge. Pay close attention to how it opens and closes. otherwise once it’s on, if backwards, you’ll have to take it off. So, back to it. I laid the hinge along the back side of the table top and marked where to drill my holes for the screws. Then I measured the wall. The legs were 28 inches tall and the table top is 3/4 of an inch thick, so from the floor up, I measured 28.75 inches. That’s where the edge of the hinge needed to be. Next was the first tricky part. This table top was 33 inches long (32 inches long plus the two trim pieces that were each a half inch thick) and the space was 34 inches before anything would scrap against anything else). I measured and remeasured, and found the “sweet spot” that would allow free motion of the table without hitting the knobs to the craft cabinet or the seating/sleeping area to the other side. I held the hinge up in place with some painters tape. Then I drilled the holes to make the actual hanging of the hinge easier later. I pulled down the hinge from the wall, removing the tape. From here I screwed the hinge to the underside of the table after running a thin bead of silicone adhesive along where the two would meet. In my head, anyway, this was going to help to make a more secure bond that wouldn’t let water to seep in between the wood and hinge into the drilled hole. Even if it’s just in my own head, it made me feel better.  Last was the second tricky part, screwing the remaining side of the hinge to the wall. I had to sit on the floor and balance the table on my head line up the hinge to the pre drilled holes on the wall with one hand and drill the screws in place with the other. It was an exercise in balance and patience, but, I did it. I also employed the bead of silicone adhesive technique I used before. Once the kajillion screws were set it was obvious that this thing is never going to fall. It’s very secure. I allowed the table top to hang in it’s closed position for a little bit while I cleaned up the mess I’d made. Put tools away and such. By then, and because it was hot out, I knew the silicone would be dry. So I tested out the function of the table. The legs slide into their collars and the screws into the recesses perfectly. It’s stable and solid when in use and stores flat against the wall because of the hinge. The legs fit nicely into a little niche I have beside my craft cabinet next to the roll of craft paper that I have.

Here it is up:


And here it is down:


So, there ya have it. I will edit this later with a nicer show of the table.

Until later,

Melissa

Shop with me at:

http://www.stampinup.net/esuite/home/melissaengeseth/

and if you are interested in Paper Pumpkin:

https://www.paperpumpkin.com/en-us/sign-up?demoid=2164821


Visit my Facebook page at:

https://www.facebook.com/PineconeCrafter

Or, visit my YouTube Channel:

https://www.youtube.com/user/mrsengeseth

Camper Project: Cushions (finally)

Hello! Welcome to the blog. Today is the day! Finally, the cushions are done and ready to be shared. For memory sake here’s what they looked like before.

20170423_152002

I don’t know if you are able to appreciate just how awful these are. I mean…really. Take another look. Although the blue goes with the stove very well, it is still making my eye want to poke themselves out. And the stove isn’t staying blue anyway (spolier alert!). There’s nothing redeeming about these cushions. Except for the fact that they are in relatively ok shape. They just need to be recovered.

And therein lies the rub. I searched online, my local Walmart fabric department, JoAnn’s, and Hobby Lobby for nice thick upholstery fabric and was amazed at how expensive this was going to be for a shoestring budget such as my own. at the lowest 20 bucks a yard. A YARD, folks. That took me aback, lemme tell ya. At this rate I would need just about 2.5 yards PER cushion. at 5 cushions alone for just the dinette, that works out to…carry the one…times by 5…one arm, half a leg, and three quarters of my first born. So, uh, no. I needed to come up with another idea. Quick. Because those cushions were’t gonna work. Just look at them again!

I was thinking that maybe I could find some cheap fabric at the thrift stores locally. To get to the area that my local ARC has the fabric, I had to pass the draperies. I passed that by two steps and stopped short. Almost being run into from behind by my child pushing the shopping cart. DRAPERIES. Scarlet O’Hara did it, I certainly could, too. Only the camper would wear them.

So, I  got a bunch of heavy duty curtains. Two in two different browns with coppery metallic sheens and threads in them. One in a deep red. And, one in a stripe pattern consisting of burnt orange, red, white, and beige. The most expensive regular priced one was 6.99 and the least was 2.99. This one was discounted 50% off of the tag because that color tag was the special this week:

The first photo, the closeup, is an accurate representation of the curtain color. It’s huge and has a nice texture. Plus, it was two bucks. A fantastic price for that much yardage and for as heavy weight as it is.

So, I took these all home and got ready to sew them onto the cushions. I washed them all and dried them all. Then I took the first cushion and using the red fabric (started in the dinette)  I wrapped the fabric around the cushion allowing myself a good six inches of overlap. I cut this down to size and used needle and thread to tack this to the cushion. That was a pain, broke two sharps in the process. So for the actual stitching, I went to Walmart and purchased some upholstery needles:

https://www.walmart.com/ip/Curved-Upholstery-Needles-Assorted-4-Pkg/36799401 

Ok, armed with these babies, I went back to work. Since it was tacked to the cushion this should be easy enough to sew. I went along the long seam first (centered in the middle of the underside of the cushion). It’s still tough to sew, but, I am pretty determined at this point. I got the long way done and decided the best course of action for the short sides was to fold the fabric in like one would when carefully gift wrapping a present. I sewed down all the folds using this cursed  curved needle. It took me 2 hours. Two hours. Forget that. Who wraps stuff anymore?! For Heaven’s sake, I don’t; I use gift bags! And thus, I made sacks for the remaining cushions, instead.

Here’s Mog, not at all judging me for not thinking of the pillow case idea sooner:

20170424_065128

Yes, she is. She is indeed judging.

While sewing the first case for my remaining cushions, my sewing machine broke. I about lost my ever loving mind. Good thing I had a gift card for Walmart. I ran there and got myself a new machine. The old one was beyond repair anymore. It was time to let it go. I’ll share more about the new one later.

For the long back side of the dinette seating I removed the screws that held it to the wall. All this is is fabric and padding wrapped around plywood. Easy enough to cover. These had a white plastic decorative ring that the screw threaded through. I spray painted that with copper paint and set those aside to dry. I laid the back onto the fabric and wrapped this tightly to the back. I stapled it with my staple gun beginning in the middle of the long sides and pulling taut along the length. I repeated this process on the opposite edge and the ends as well. Once done, I simply screwed this back into place.

I created what amounted to pillow cases for each of the remaining cushions. I measured haphazardly and just eyeballed it mostly. Testing it here and there on the cushion again and again until the fit was just right. I was a mess of straight pins and thread.

Once the case was on the cushion, I tucked in the dog-ear looking corners to create a nice mitered edge and hand sewed that in place. MUCH EASIER. Until I moved onto the big cushion for the back of the camper. For this I had a thrice folded memory foam mattress topper. sliding this into the pillow case was WAY harder than it looked. Not only is it crazy heavy, but the foam material seems to reach out and grab the edges of the case like a cat refusing to go into the crate to go to the vets. Much grunting and gnashing of teeth by J and me and to no avail. We could only get it into the case about three quarters of the way. SONOFABEECH!! This sat on my kitchen floor being shunned by us the entire rest of the night. We were done wrestling with it. Almost chucked it into the street. I was beginning to question my desire to have the camper at all. It was crazy frustrating to fight with the mattress topper trying to squeeze it into the pillow case. I tell you , the next morning it slid the rest of the way in like butter. I have no idea why, but, I am glad it did. I ran and got J to show him my accomplishment. I tacked the very end shut and called it a day after throwing that in place into the back of the camper.

This leaves the last cushion, which is going to be a bit weird. I had to go buy a new cushion because the last one didn’t fit the length of the space I had. It was much too short. In fact 75% too short. I had to think about this for awhile. I went to the Army Surplus, Hobby Lobby and Joann’s and couldn’t come up with a solution…till I went back to Walmart (surprise…ugh) and passed the crib mattresses. For $20.00 I picked up one thick and sturdy enough to fit the bill. I can cut down the blue cushion enough to fill the gap. Once inside a case, no one will ever know. And, I don’t care if they do. I am so over these cushions, I can’t even tell you. Here’s a quick pictorial of that. Pretty simple:

First I marked out what I needed to cut away from the piece I already had. I got all Jason Voorhees on it:

20170608_150003

Until I had the piece I needed:

20170608_150257

See, it fits along the end of the crib mattress and is ready to cram into a pillow case made to fit:

20170608_150348

And here’s the finished results of all the cushion recovering:

20170502_160759

20170604_180458 (1)

20170608_153905

And that’s it for those. Couldn’t be happier that they are done and they aren’t that terrible blue that they started out as.

Until later,

Melissa

Shop with me at:

http://www.stampinup.net/esuite/home/melissaengeseth/

and if you are interested in Paper Pumpkin:

https://www.paperpumpkin.com/en-us/sign-up?demoid=2164821

Visit my Facebook page at:

https://www.facebook.com/PineconeCrafter

Or, visit my YouTube Channel:

https://www.youtube.com/user/mrsengeseth


Camper Project: Super cheap flooring

Hey, there folks!! This is going to be a long one, you might want a cup of coffee and some snacks. Get me some while you’re up! One cream, no sugar, please!

I’ll start with what I used, so that you’ll know what I am talking about…or rambling about…or ranting about, depending on the thing.

My flooring materials:

http://www.homedepot.com/p/Sande-Plywood-Common-1-4-in-x-4-ft-x-8-ft-Actual-0-205-in-x-48-in-x-96-in-479023/100073744

http://www.homedepot.com/p/Rust-Oleum-Parks-1-gal-Clear-Semi-Gloss-Water-Based-Polyurethane-for-Floors-258691/202521762

http://www.homedepot.com/p/Minwax-1-qt-Wood-Finish-Provincial-Oil-Based-Interior-Stain-70002/100376177

Special note: Stain rags are combustible. Like, crazy combustible. A few years ago, my ex had a fire in his truck because one ignited on it’s own. Notice guys, I said…on. it’s. own. Just the rag with stain on it. Don’t play around with this. Read and follow the stain instructions closely and carefully. Follow the directions for disposal to the letter.

My flooring tools:

Brad nailer (remember, I am using really thin flooring material, I don’t need a standard sized flooring nailer, it would destroy the flooring) https://www.walmart.com/ip/Stanley-TRE550-2-in-1-Electric-Stapler-and-Brad-Nailer/14146044

circular saw: https://www.walmart.com/ip/Hyper-Tough-12A-7-1-4-Circular-Saw/45466952

orbital sander: https://www.walmart.com/ip/HyperTough-2.4A-Orbit-Sander/45626157

jig saw: https://www.walmart.com/ip/Black-Decker-BDEJS300C-4.5-Amp-EPP-Jig-Saw/43357898

Misc

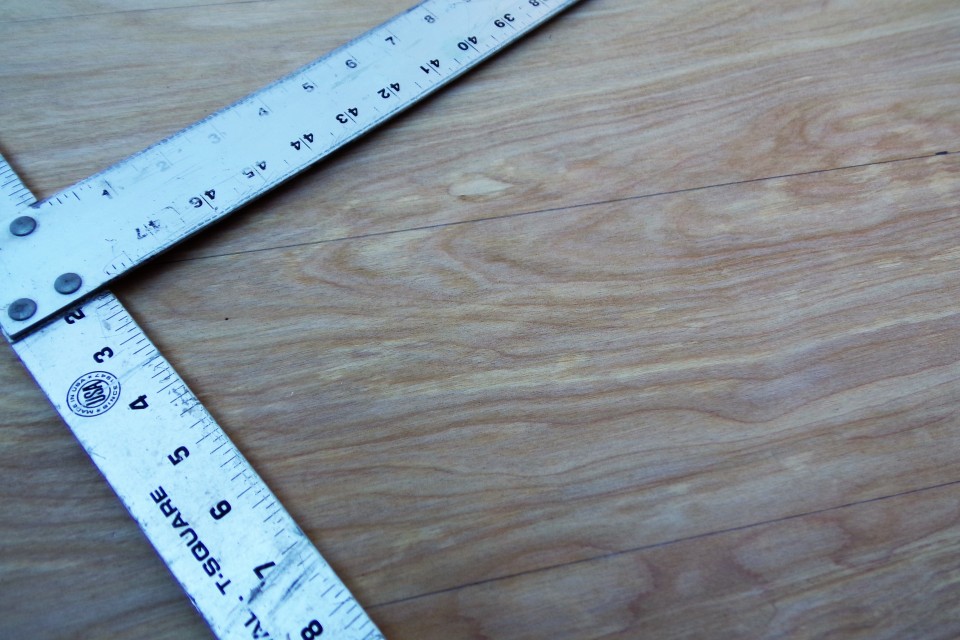
3/8” brads, paint brush, sand paper, pencils (several), hammer, construction adhesive ( https://www.walmart.com/ip/Gorilla-Heavy-Duty-Construction-Adhesive-9-oz-White/133769442) Note: yes, I could have gone way cheaper on this, but, I wanted to find something that fit my needs. After extensive research regarding strength, longevity, adhesion, and a company that stands behind it’s product, I was happy to spend a little more to get what I wanted. Latex gloves (for working with stain), T-Square ruler, tape measure, 6 inch paint roller, clean terry rags, clamps, and paint tray round out my supply list.

Slightly less special note: I prepped the floor ahead of time. I could tell from the cuts I was making on the wood that some edges would be a little wonky, which would expose the awful floor underneath. So I decided to paint the floor to help it blend somewhat better. After repeating the paint selection method from a prior post, I settled on Color Place: Black Bread from Walmart. One coat was all I really needed since it appears to be a Kilz product according to the paint chip at the store.

On to the meat and potatoes of the post

I had decided the look for my floor was going to be some sort of mash up of reclaimed, repurposed, kind of wonky, not quite perfect, minimally controlled disaster. I wanted it to look like it’s been there all along and that it was very worn.

Again, after Pinterest-ing (I think I might need to get myself into a program. Not even kidding) I decided I would tackle a DIY floor using plywood. Search “plywood flooring” there or on Google and you’ll find a bunch of floors using this technique. Plywood is readily available, easy to handle, and pretty cheap, so, there ya go.

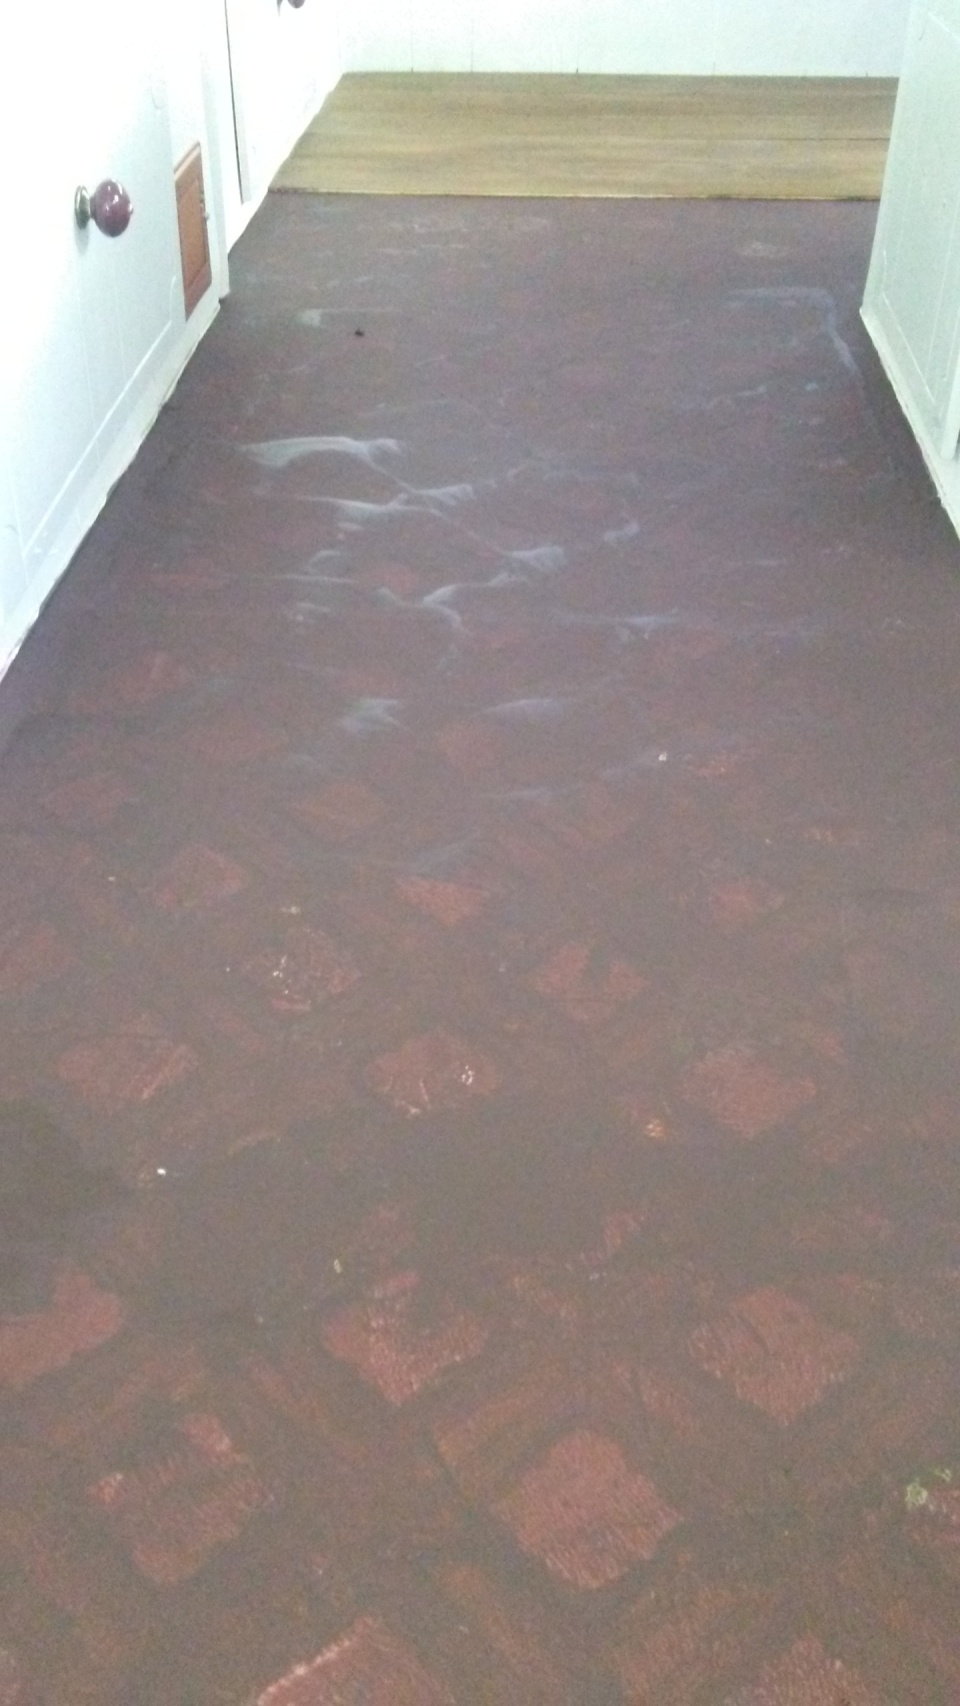
For reference, here’s before. The weak-stomached among us should turn away now. Cover the childrens’ eyes. You’ve been warned.

KODAK Digital Still Camera

Ummm, yeah. (shudder) Not so awesome. But, we’re going to fix that. As soon as humanly possible.

Off to Home Depot I went where I picked up two sheets of plywood. I had them cut each one in half from 4×8 into 4×4 sheets. That makes them way easier for me to manhandle into the back of my mini van. Not the most or worst of what this vehicle has hauled around. I also grabbed a gallon of polyurethane and the stain I wanted. Next, I ran to the local Walmart and picked up a new package of sanding sheets for my orbital sander and a new plywood blade for the circular saw.

A random note about those two Hyper Tough brand tools (my orbital sander and my circular saw). I got them at Walmart. I have heard and read reviews suggesting that they aren’t of the highest quality or that they don’t hold up. I beg to differ. I have added them to my tool collection after my divorce, as mine went with the ex. I needed something manageable and at a price point I could squeeze into my budget. These fit into my hands because they aren’t super bulky. They help me to get the job done. I am not paying for the bigger name on the tool, but, it’s getting value for the cost of the tool…if that makes sense. Now, many of my tools are those bright red Hyper Tough tools. I am happy with the selection that I have. I will still enjoy my Rigid, Ryobi, and Stanley, but, these really are great. I won’t hesitate to add more to my tool closet. And no, this isn’t sponsored.

Back to the post

I got these sheets home and couldn’t get cutting fast enough. I marked out the plywood into six inch by four foot planks using my T-Square ruler. It’s gigantic. Love that thing. I went WITH the grain of the plywood.

KODAK Digital Still Camera

I did one sheet at a time and lost my pencil each time I moved to the next. I have no idea how it happened. I suspect there is a rather academic squirrel who has snatched them to write his thesis up in his tree somewhere. But I have no proof. And I have no pencils anymore.

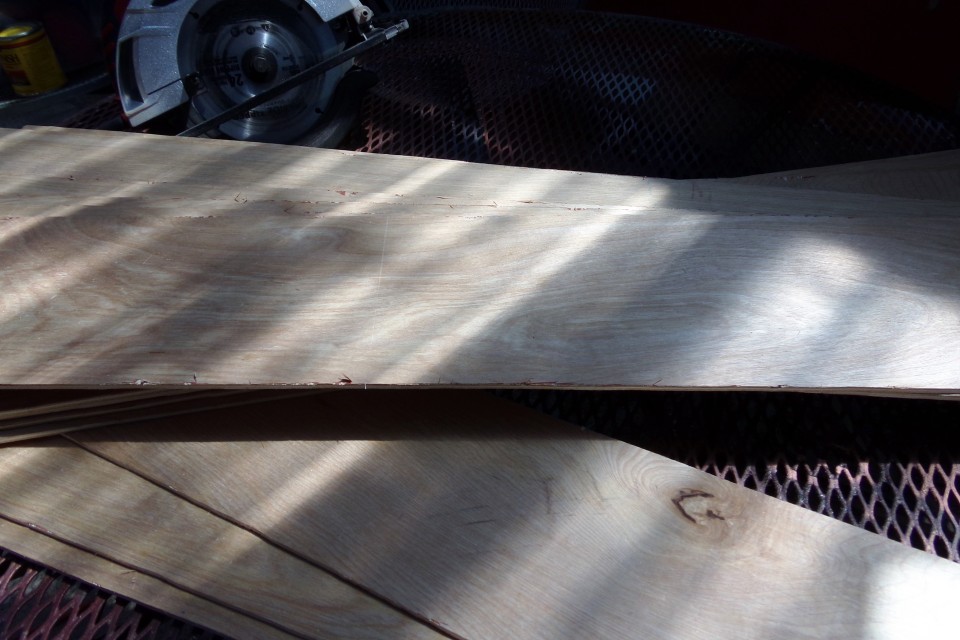
Using my clamps (also Hyper Tough, btw), I secured my plywood sheets down and used the circular saw to cut them into planks. I got the first sheet done and my arms were shaking. I was really going to do this! Really, really!! I had my stack of eight planks done and three uncut sheets to go. But, for now, I focused on these eight planks.

I pulled out the orbital sander and put 80 grit onto it. I sanded my edges and made sure to be as nonuniform as possible. I wanted wear on the edges, corners and long sides. I gouged at it with the sander and didn’t mind if I went too far. When choosing what side would be the top of the board, I looked for imperfections; knots, uneven color, and … well, character.

KODAK Digital Still Camera

Last for this step, I stained the boards. I donned the latex gloves and used an old terry rag that I would be disposing of afterwards. There is a big difference with the stain and I love the color now.

KODAK Digital Still Camera

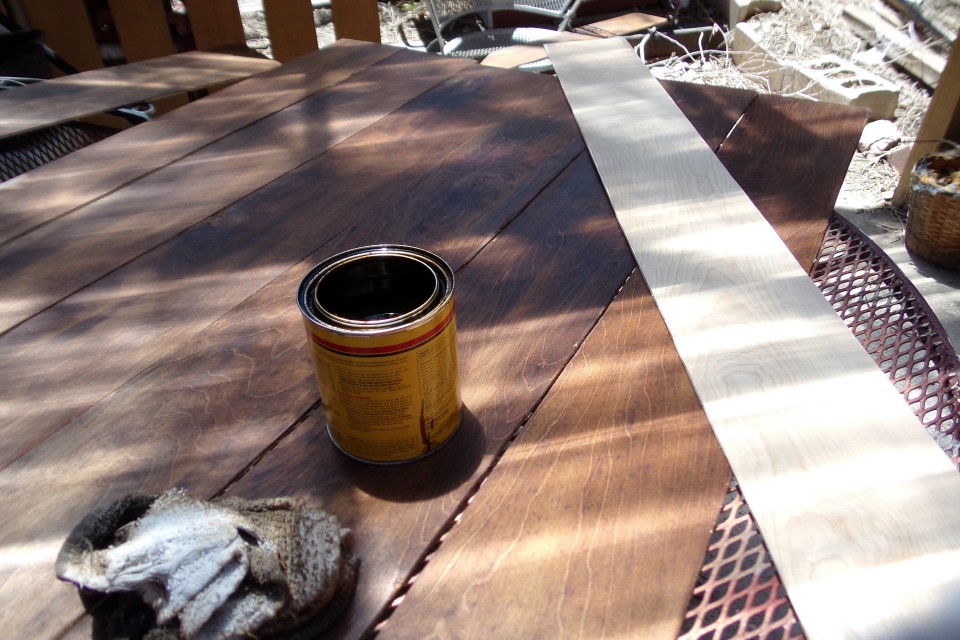
Again, I can’t stress this enough. Pay attention to the warnings that are on the stain can. It’s important.

By now, my arms were shaking for another reason. I was exhausted. I did eight boards, Cut, sanded and stained. Great. But, c’mon Missy! Eight??! There’s twenty-four more to go. Thankfully, J was willing to cut the rest for me and those were done the following day. I took the eight I did to the camper to get a visual as to how I wanted them to lay out. Since the supports for the camper go lengthwise to the camper, I was definitely going to go across the floor. It would be more stable. At least that was what I’d learned when it came to flooring houses; go across the joists, not with them. I could be wrong, but, that’s what I was taught.

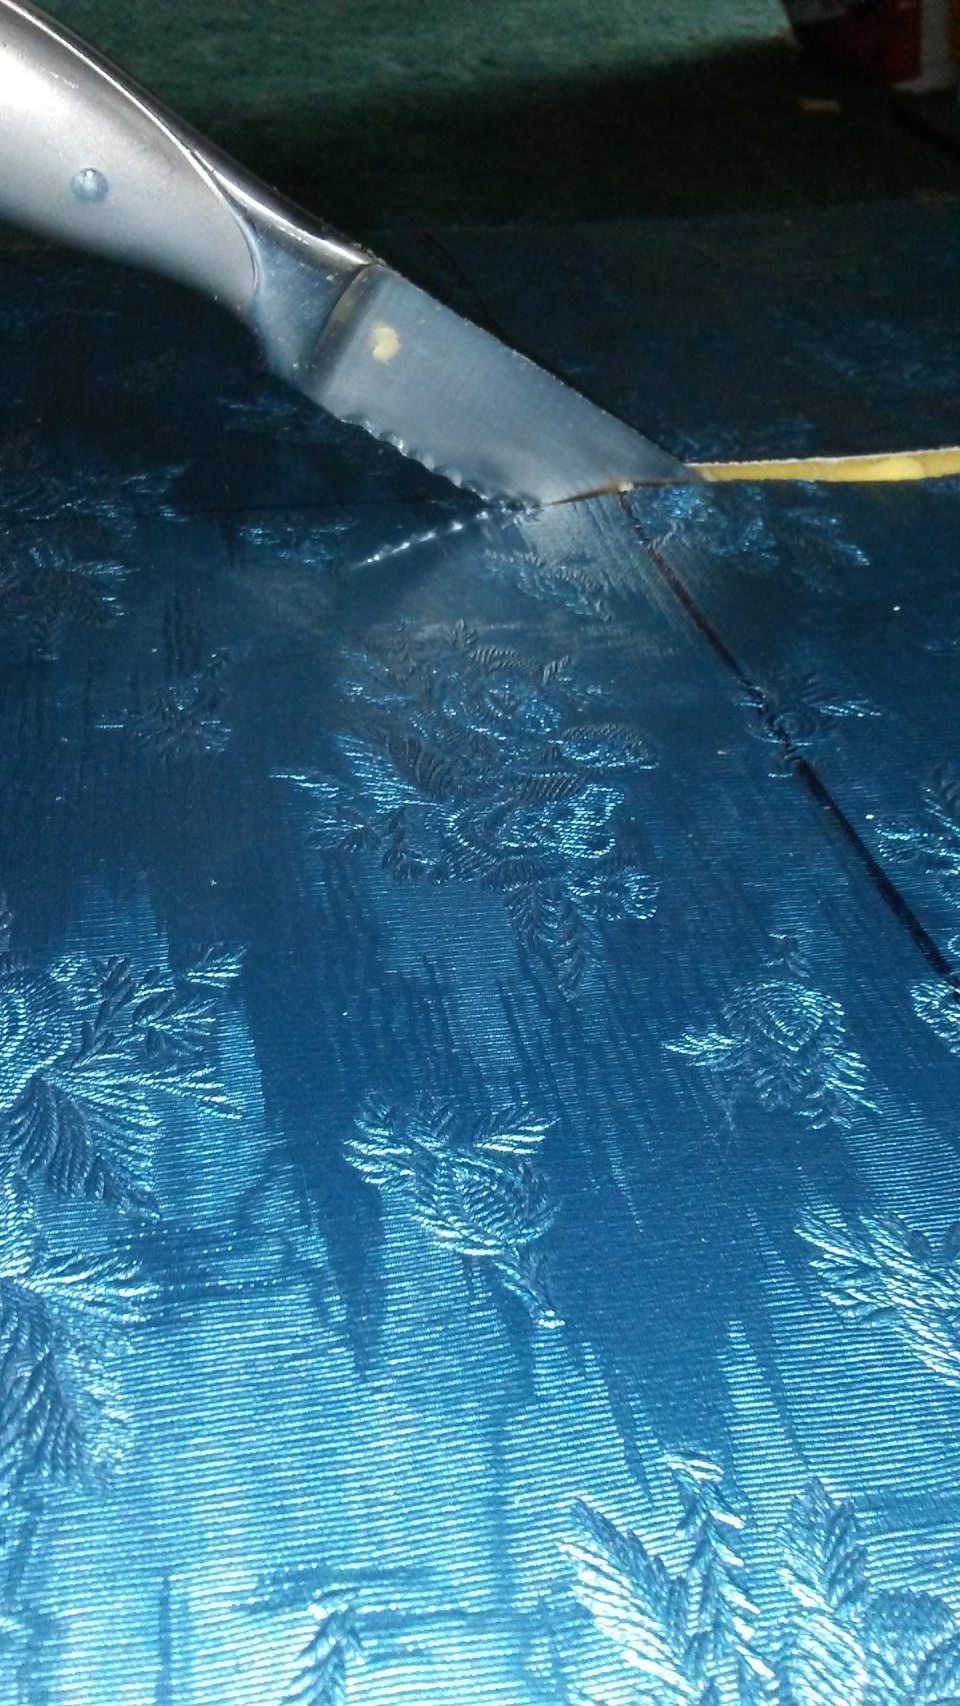
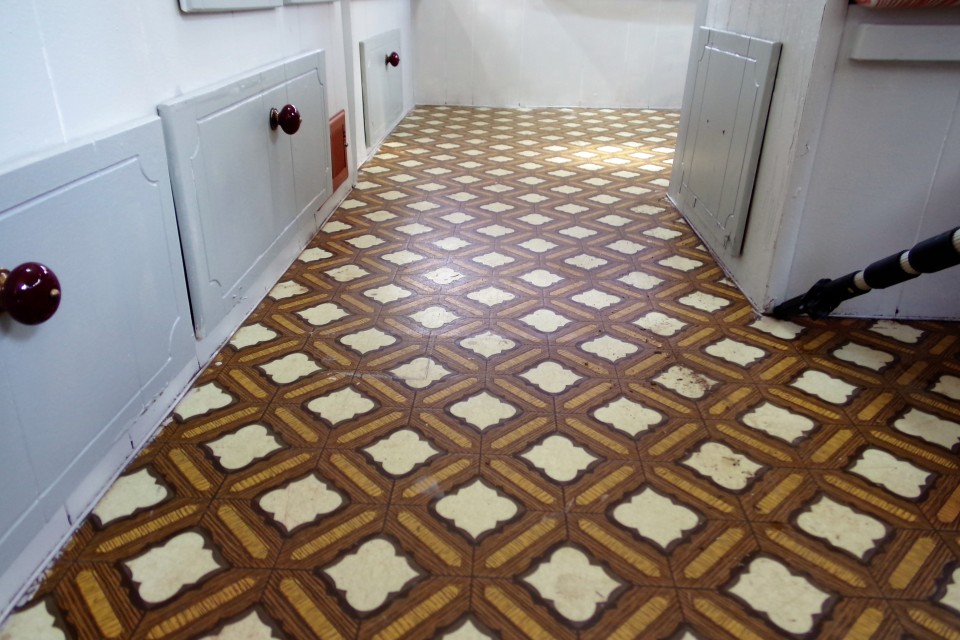
I was attempting to get my visual, when I remembered this. I needed to get this up and gone before I could do anything. There were two in the camper. This one was destined to go to the recycling center. I used my ratcheting screwdriver (again..Hyper Tough) to get them out. They came out way easier than I was preparing myself for. One will go, one will be returned to it’s spot.

100_1002.JPG

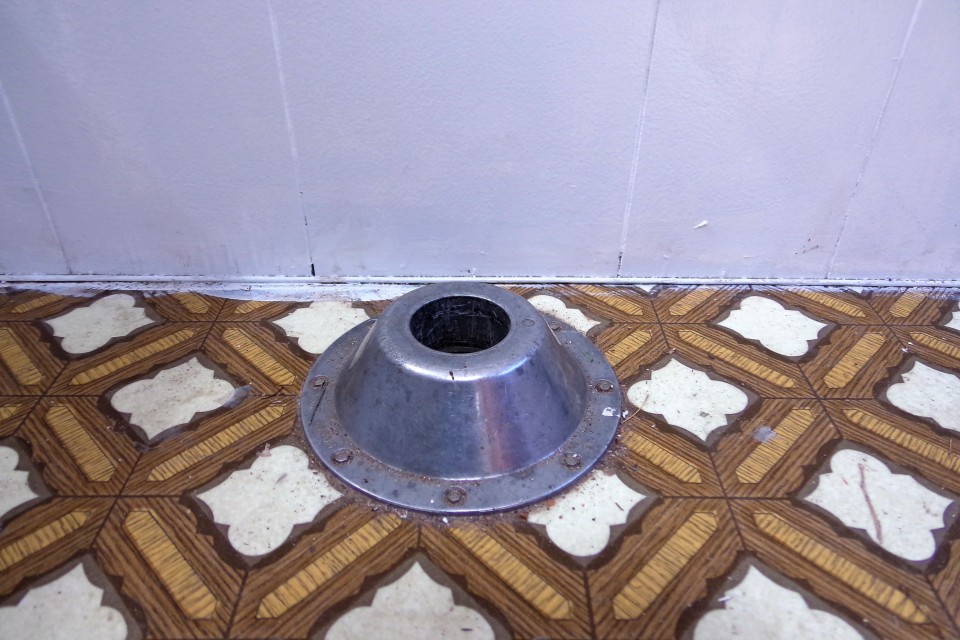
That one had to go. The other one, for the dinette, will be spray painted copper before it gets put back. Now I could see at what the flooring was going to look like:

KODAK Digital Still Camera

Now, of course I am going to stagger the boards. But, can we talk a minute about how awful this floor is? You might be able to zoom in and see that these have a wood print on the vinyl. The design is ultra old. And yet somehow very familiar. Probably something form childhood. Unfortunately, because of the wonky edges to my boards, that was going to show through in between. Um, that’s gonna be a firm “no” from me. I sat looking at this for a little while and decided I would paint the floor with something cheap.

Off to Walmart, again. I grabbed the cheapest paint possible, in a flat finish and painted the floor a dark brown color. I grabbed another package of foam rollers to put onto my paint roller as well.  Here’s that:

20170526_072555

Not perfect at first glance, but, you won’t notice once the flooring is down (I tested that theory by laying out the flooring on top of it again). Not sure why the color is so washed out. But, there you have it.

On the next day, I sanded and stained  eight more boards. I repeated that for the next two days following and I had all my boards stained and ready to go.

Now was the time to get serious about laying out the floor. My long pieces were just whole pieces and then I cut long boards down to fill the gap between the whole board and wall. Easy peasy. Each cut I made I sanded and stained to match the rest of the board. Some cuts had to be thought out more. Like to fit around the built in seating and such. But, after hunting down more pencils (danged imaginary squirrel!), I marked the boards on the back and cut accordingly. I only messed up eleventy hundred boards. Good times.

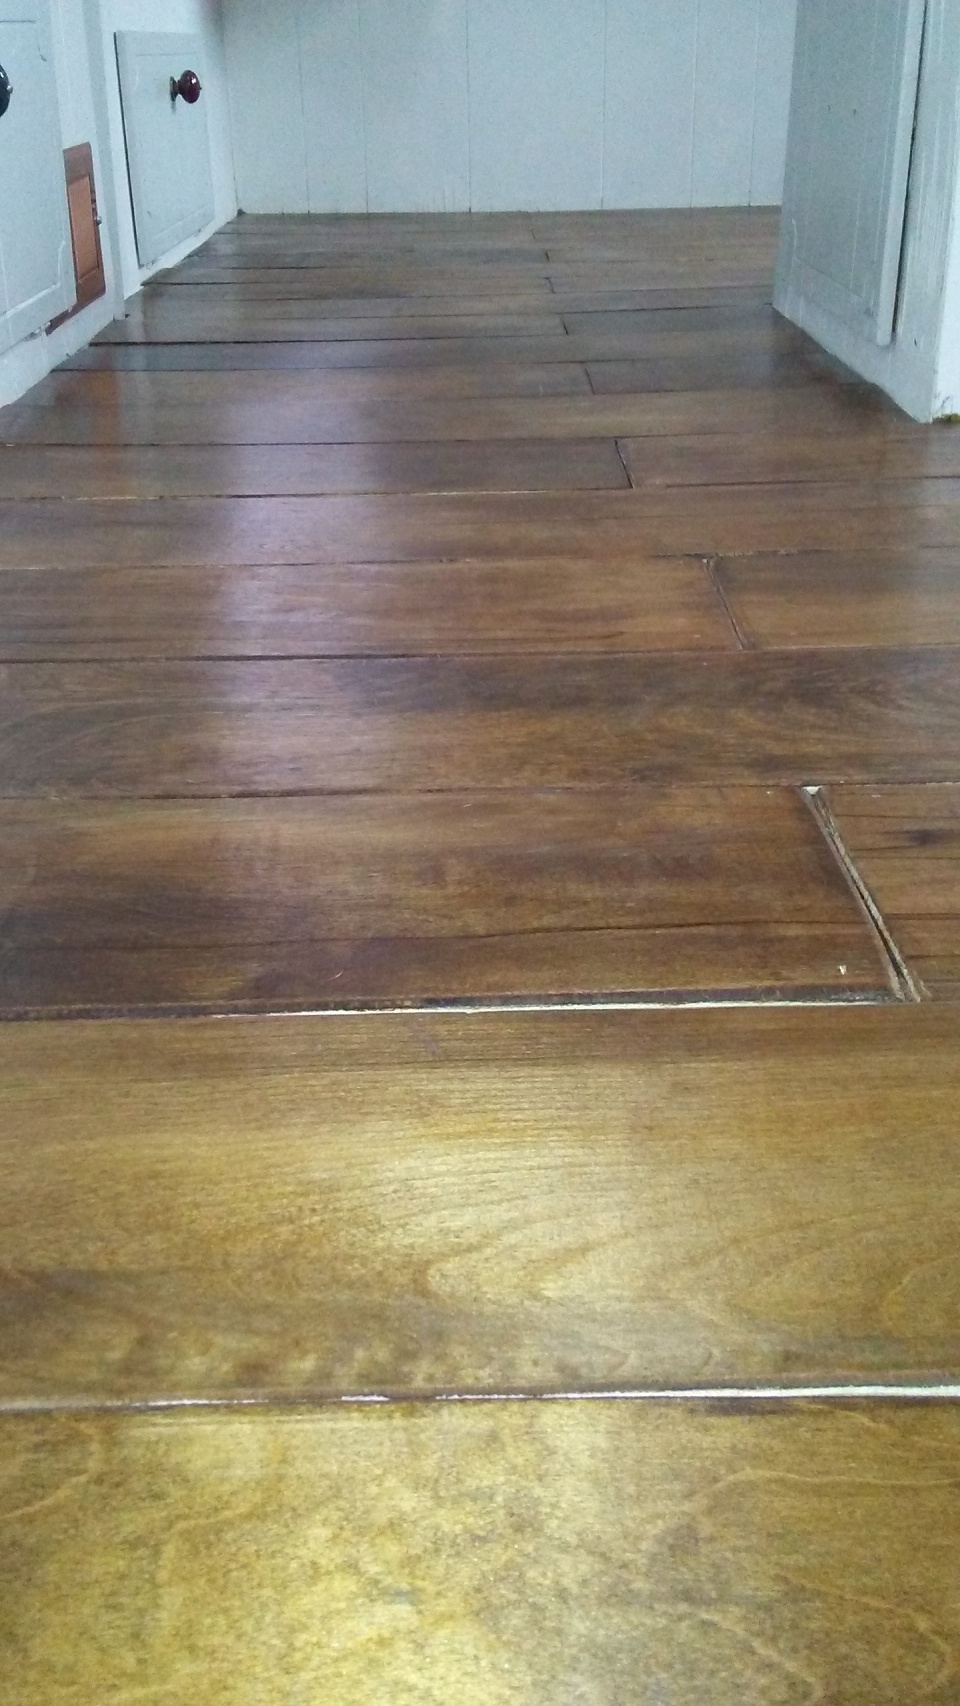
When setting the boards, I used the construction adhesive; applied in a zig-zag pattern on the back of the board. I placed the board and squished it in place. I nailed the corners with the brad nailer and kept going. Some of the brads didn’t quite go in far enough, but they were easy enough to tap into place with the hammer. This took me three days to do because of all the miscuts and retries. But, finally, yesterday morning, I got it done. I am not sure what’s up with the color and the boards in this photo, it doesn’t seem an accurate representation . Maybe the flash messed with it a little.

20170602_123858

After sweeping and carefully wiping the dust away the next and final step is the polyurethane step. It’s a three part step. The first of which was to use a brush to “cut in” the poly around the edges of the floor and into the hard to reach areas and then to use the roller to spread the polyurethane all over the floor. Let dry completely, according to package directions. The second part of this step is to sand (I used 220 grit) any imperfections and spread out more poly with the roller after wiping dust away. And again, let dry completely. Last part is to repeat step two (as many times as necessary).

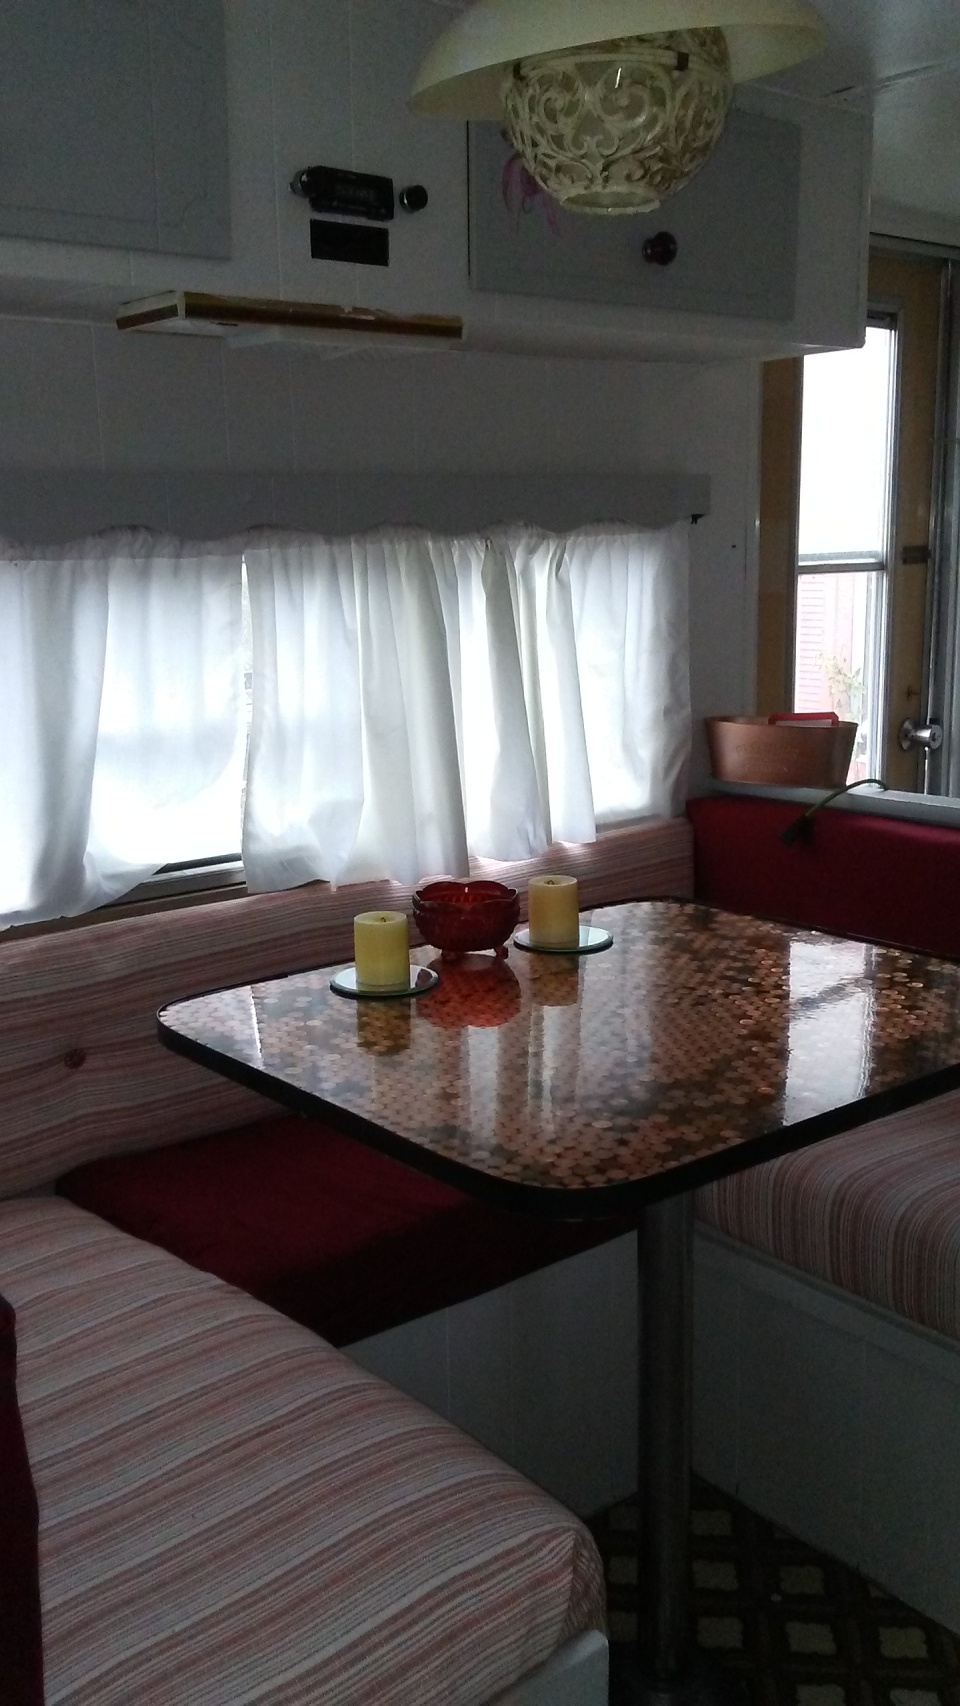
And lo, here’s the finished product. Behold!! Are you beholding??

All it needs now is trim added. That’s pretty straight forward, so I am not going to photo and describe it. I used quarter round painted dark brown along all the edges to finish it off. You’ll probably notice that in a photo later on in another blog post. Keep an eye out for that. Kind of a dollar store version of “Where’s Waldo?”.

Now my camper has a better looking floor than my house does.

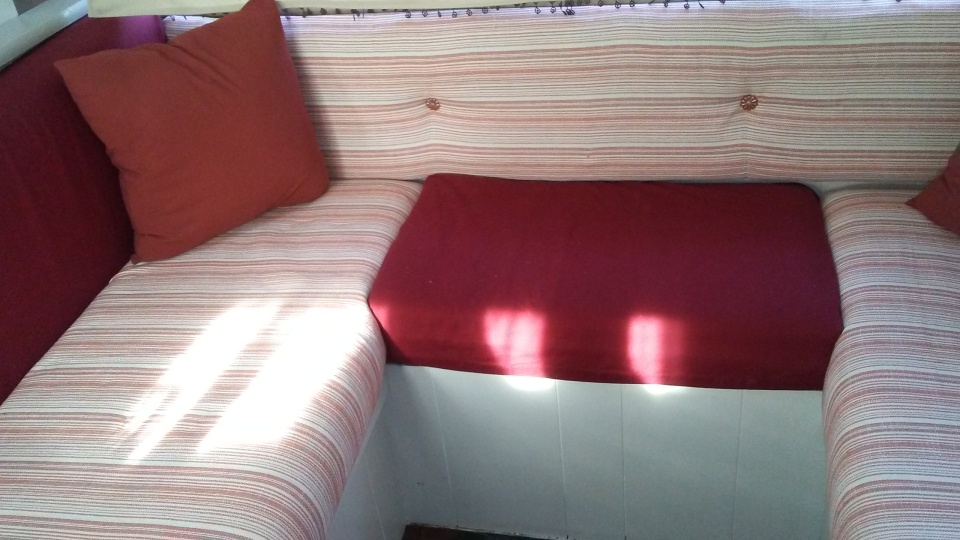
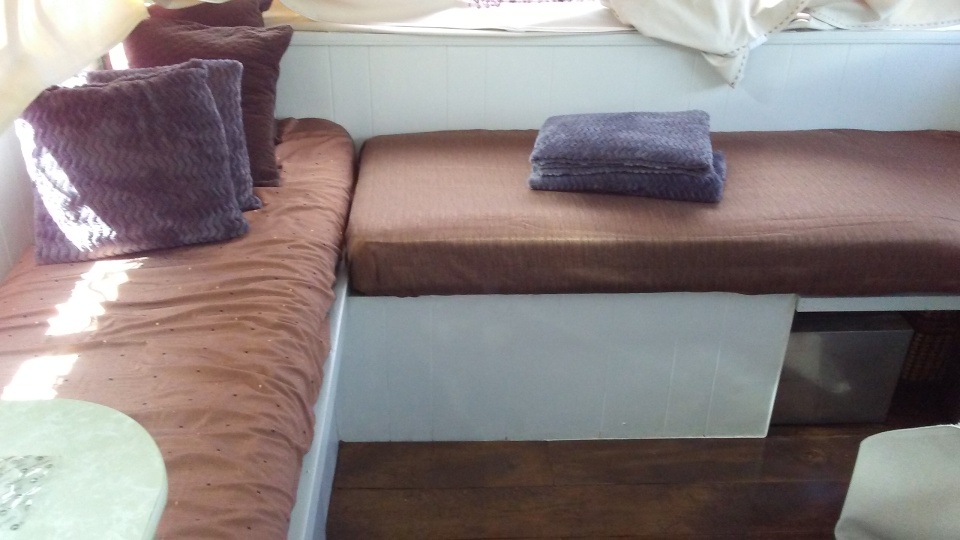
And I STILL need to take care of all the cushions

Until later,

Missy

Shop with me at:

http://www.stampinup.net/esuite/home/melissaengeseth/

and if you are interested in Paper Pumpkin:

https://www.paperpumpkin.com/en-us/sign-up?demoid=2164821

Visit my Facebook page at:

https://www.facebook.com/PineconeCrafter

Or, visit my YouTube Channel:

https://www.youtube.com/user/mrsengeseth

Camper Project: Painting

Hi everyone!

There comes a time in every single one of my projects where a little paint must spill. Or at least be slathered around as much as possible. The pure white walls of the camper were screaming at me to give them a little color. “Pure white” is a bit of a stretch. A lot of a stretch. The interior was painted with what I can only assume was white primer. Everywhere. E V E R Y W H E R E. But, it was also splotchy and it didn’t cover well.  I felt like I was inside a dirty marshmallow.

Here are two shots. Right now we will be focusing on the walls and to some teeny tiny degree, the seating area. I will go into more detail on the floor and stove later (umm..yes…my precious little blue stove…). And, I will also go into details of the “command center” that you’ll see in later photos…later, as well. (Those will be two more blog posts at later dates.  Oooh, hey, I am getting the hang of this blogging thing!!) So with out further ado, the before shots:

Meh. Not terrible, but, definitely not me.  So, I went on a hunt to find colors and painting supplies. I found what I was looking for at two places, score! And the prices were within the scope of what I wanted to spend. First, at good ol’ Walmart I picked up the supplies.

A paint roller set, brushes, disposable liners, replacement rollers, and a paint can opener. Easy, Peasy. I got in and out pretty quick. I found what I was looking for and spent more time in the check-out line than I did looking for my supplies. Which wasn’t really bad, either.

Here are links to some of what I got:

https://www.walmart.com/ip/Metal-Paint-Tray-9/17165827

https://www.walmart.com/ip/Premier-Paint-Roller-PTL-10-Solvent-Resistant-Paint-Tray-Liner-9/114741913

The kit I got had this in a six inch size, But, I can’t find the kit in stock: https://www.walmart.com/ip/Shur-Line-16-Quick-Pro-Foam-Rollers-03740/21075359

Here’s a similar kit, with larger rollers. https://www.walmart.com/ip/Shur-Tech-6-Piece-Good-Paint-Tray-Set-Olive/36384486

I should have taken photos of what I got, but, I didn’t even think of it. Anyway, they also have a three piece brush set that I picked up as well.

From Lowes I was careful to find exactly the paint I wanted. I wanted a good brand, and found Valspar Signature. I wanted a paint that would hold up to some cleaning and I didn’t want crazy shiny, so, I chose satin. Now for the color. I didn’t want white. Dear God, no more white. My color scheme was going to be my favorite colors. Not all of them, but, some of them. Kind of a fall palette. Browns, oranges, grays, red and copper accents. I figured the gray would work as the background to showcase the other colors. And it came down to what kind of gray. Blue-gray? Green gray? Purple gray? Just shoot me now.

I spent way too much time looking at the color choices while wishing I could just be anywhere else. I didn’t want to be that color person. You know, the one who scrutinizes ever aspect of a color nose up in the air. “Archibald, this isn’t the same color as the mane of the award winning stallion in the last derby we attended (said in a nasally, annoying, condescending tone). Oh, we must tell Winston the third of this quaint little  blah, blah, blah”. I don’t know why, but, in my head it’s super uppity, and not what I wanted. So I closed my eyes and thought of the color that would be most soothing and when I opened them I saw “Madison White”. Urgh, “white”  but, against white it was very much a soft gray. and definitely not white. So, perfect! Moving on. I needed a deeper accent gray that I would use for some trimmy (not a word) bits and for doors and drawer fronts. I employed the same method of closing my eyes and trying to imagine the color already in the project and what that would look like. This time though, the color didn’t jump out at me. I had to dig through the paint chips and eventually found what I was looking for. Granite Dust. Okie dokie. Two quarts of the former, one of the latter, please. And I was out of there.

We removed doors, took them outside onto the patio and began to paint. We were very nearly finished. And then it happened. The skies opened up and and each form of precipitation dumped down. The roof of the patio was already Swiss cheesed from the last wind storm that dropped a branch from the neighbors tree on it. so we had to get them inside in a hurry.  Rain, sleet, hail, and snow all dumped down alternatively in the span of ten minutes. Colorado weather. We quickly moved them inside the house and thankfully there was very little smell to the wet paint.

The next day we tackled the walls of the camper. As mentioned before, the drawers, doors, trim over the windows and accents were done in the Granite Dust and the walls and large remaining areas were done in Madison White. We rolled and brushed it on without worrying about drips on the floor as I plan on re-doing the floor later. We were, though, extra careful around the ceiling. Though it’s white, it was well done and just enough white to show the color of the Madison without the marshmallow sarcophagus feeling.

A special note regarding the drawers, cabinets, and doors: I knew that the awful drawer pulls that were on there were going to be replaced. So with only the bathroom door as an exception, I removed that hardware and used filler to fill in the holes left behind when the hardware came off. I let that dry, sanded it and then painted. More on that in a later post.

I have to tell you, with the whole interior of the camper painted, it looked and felt a billion times cleaner, fresher.

20170531_075355

20170531_075414

It looks like the walls are Granite Dust like the cabinet doors, but, it’s just the shadows.

After getting that done, I took all of the vents off (all covered in white primer from previous owner) and tried to decide on what to do with those. There were three. One partway covered by a cabinet door (??) and two under the fridge. I took them all out and painted them using this copper colored paint. It worked exactly as I wanted, fitting into my color scheme plans perfectly.

We had some leftover paint from a project inside the house (a chalkboard wall in the office room). So I pulled that out and we painted the refrigerator door and the insets in the storage/bunk loft area. So we have a few fun areas to use, too.


Unfortunately, some of the color looks washed out. I don’t know if it’s my skill, phone, or the lighting. Promise you, when it’s all done, I will do a video walk through and you’ll see the actual colors better.

Until then,

Missy

Shop with me at:

http://www.stampinup.net/esuite/home/melissaengeseth/

and if you are interested in Paper Pumpkin:

https://www.paperpumpkin.com/en-us/sign-up?demoid=2164821


Visit my Facebook page at:

https://www.facebook.com/PineconeCrafter

Or visit myYouTube channel:

https://www.youtube.com/user/mrsengeseth


Camper Project: Penny Table

Hi there everyone!!

While perusing the Pinterest boards for inspiration I was struck by a floor done all in pennies. Search “penny floor” there and you’ll surely find it. I was looking for “copper tabletop ideas” and stumbled upon that gem. Once the idea clicked in my head…you know, to smash the two ideas together…floor and table top…I couldn’t shake the idea out. No amount of “That’s a literal waste of money” or “You’re defacing the coins!” would loosen my brains determined grip on the idea. So, I justified the idea these ways:

  1. Refinishing a table was going to cost money one way or another. At least this way I get to keep it (the money) in my possession and can go look at it any time I want to. Encased safely in its epoxy cocoon.
  2. You aren’t defacing the coins, as they aren’t going to be used as currency again. Ever. Really, they’re not coming back from this.
  3. This is an opportunity to do a project with my children that we can all have a part in.
  4. And lastly, a defiant, “You’re not the boss of me!!” just for good measure.

So, with intent and a plan, we pulled out the table and began to prep it. We started by cleaning and sanding it. We peeled off the edge bits. No idea what those are called, so, henceforth I shall refer to them as edge bits. Here’s what the table looked like to start, for reference purposes:

penny table before

I mean, it’s not that awful. It’s just rather…plain. Very plain.

We got started in a hurry. We cleaned it with every cleaner we could find, sanded it, and as mentioned, we removed the edge bits. Then, we went off to Home Depot and purchased … um…new edge bits. Honestly, I am stinking at this blogging thing, I have no idea what these are called. They were very thin pieces of wood, maybe an eighth of an inch thick, two inches wide and three feet long. I picked up three super cheap. I also grabbed some black Krylon Spray paint, some refills for my staple gun, two containers of bar top epoxy (this is it in case you wonder: http://www.homedepot.com/p/Rust-Oleum-Parks-1-qt-Gloss-Super-Glaze-Finish-and-Preservative-241352/202056337?keyword=bar+top+epoxy ), and some silicone adhesive. On the way home I stopped at the bank and changed a $20.00 bill into the pennies I used.

And here’s where I lost some photos. you’ll have to imagine that they were very detailed in showing exactly how we got this thing going.  And that suddenly I was an amazing photographer.

We painted the whole top of the table black and let it dry. Meanwhile we set the new wood edge bits into the bathtub in warm water to make it more pliable. Once the paint was dry we took the bendy pieces of wood out of the bathtub and bent them around the edge of the table, leaving a higher lip up top to hold the coins and epoxy once we got to that step. We used silicone adhesive to hold the edge to the table and tacked as we went with the staple gun. Then I remembered that once the wood dried, it would shrink back some. Ugh. Instead of ripping it off and stating over when it dried, I filled in any gaps I saw with some silicone and moved on with my day. We spray painted the whole thing again. I let that sit overnight.

KODAK Digital Still Camera

KODAK Digital Still Camera

The next day we got busy spreading out our penny fortune. We tried to follow a pattern. Then we didn’t like how it laid out. So we followed another pattern. And we didn’t like that either. We settled on the “ok-we’re-over-it-already” pattern and liked that good enough to move on. We did, though, make sure that we had some interesting ones to kind of play “Where’s Waldo” with spread all throughout the field. One from each year of the last 30 years. There’s wheat pennies, Canadian pennies, different ones all over the place for the kids or guests to look at.

KODAK Digital Still Camera

We then poured the epoxy per the instructions on the packaging. We ended up using both containers and frankly, could use a third. But, because of the timeframe, we stopped at two. We can add another at a later date.

At this point, the thing had to dry. and did so in the kitchen of our house for two days. Have I  ever mentioned that I have cats? Cats who’d love nothing more than to be where we don’t desire them to be? Yeah, we do. So after spending a lot of time chasing them out of the kitchen, we took the table outside and let it finish drying in place in the camper.

20170410_073112

Remember that we are pretending that i am a fabulous photographer

20170410_073141

Hrrrmmm, now I HAVE to do something about those seats…

And, in case anyone wants to know…. $12.87. It took $12.87 in pennies to cover the top of the table.

Until later,

Missy

Shop with me at:

http://www.stampinup.net/esuite/home/melissaengeseth/

and if you are interested in Paper Pumpkin:

https://www.paperpumpkin.com/en-us/sign-up?demoid=2164821

Visit my Facebook page at:

https://www.facebook.com/PineconeCrafter

Or visit my YouTube channel:

https://www.youtube.com/user/mrsengeseth

Biggest project that I have had yet!


Hiya folks!

It has been a crazy year of divorce and court and not so fun… um, fun. But, it’s all turned around and I am in a great place now, mentally. I am happier than I have been in a billion years. And lots of happy things are happening.

One of those things is finding out that it is OK to enjoy doing things thatwant to do. Crazy, huh? I have always wanted to redo a camper. By that I mean, remodel one to fit my needs. One that I can do without fear of being shot down for every single idea…something that won’t become a storage locker for tools, car parts, unfinished projects and etc. Something that will be mine, that I can enjoy at my schedule, my desire. Kinda liberating.

So to start that, it was ok to fine one that was a little…erm, rough. Here’s what I found, it’s a video tour of the camper formerly known as “Jolene”.

That was in September. I adore this camper and all the potential that she has. The name has gotta go. So we’ll come up with something better later.

There are lots of plans for her.  Fresh paint, penny table from a Pinterest DIY, recovering the cushions, painting the stove (which, admittedly drew me to her, so blue!), repairing parts, new floor…the list goes on and on, my friend.

Obviously, I am a raging amateur at it and I am not going to do this at all “right” or professionally. In the end, I believe I will be happy with the results. And, if not, so what? It’s mine and I can take it of, off, repaint, and start again.

If you are interested in the progress, follow along as I reboot the PineconeCrafter blog and share this project as well!

Melissa

Stampin Up Floral Phrases Card

Hi there everyone!!

Recently I made a new card. It’s using the Floral Phrases set from Stampin Up. Although the design lends itself to many sets and paper stacks. Here’s mine, hope you like it. keep scrolling after the pics for the PDF with the supply list and directions.

wp-1468367326623.jpg wp-1468367352838.jpg

Floral Phrases card pdf

For video based instruction:

Enjoy!

Melissa and Hannah

Shop with me at:

http://www.stampinup.net/esuite/home/melissaengeseth/


Visit my Facebook page at:

https://www.facebook.com/PineconeCrafter

Super quick mini project with new product

Wheeee!! I got to play with some product today. I didn’t ave a ton of time, but, I was able to get this done:

KODAK Digital Still Camera

KODAK Digital Still Camera

Super fun. It’s a little micro mini album. There’s room for four mini photos on each “page” of the album. As long as they are tiny photos…which my daughter is all about. So it’ll be a cute gift for her. And what’s better…this uses scraps and random things here at the house. Understand, this isn’t my original idea, I have seen it done all over the place in many different ways.

Here’s a list of the things you’ll need:

Non-StampinUp: Toilet Paper rolls (yup…watch the video, I’ll explain how to get them out before you even use the TP…), a binder ring, eyelets and eyelet setter, scissors and adhesive (although these can certainly be SU product), paper trimmer, random bits of green leaf shaped cardstock (again, could be SU, if you wanted), bone folder, Ranger MAtte Medium, and Ranger copper embossing powder…ummm oh, and Nestabilities label die.

Now for the SU goodies: Waterolor Wonder cardstock (138334), Crumb Cake  cardstock (120953), Night of Navy (100867), Love and Affection Stampset (141545)Affectionately Yours Designer Series Paper (141632), Versamark ink (102283) and stamp blocks A and C.

Here’s how I did it:


If you are interested in buying any of the Stampin Up Product, I have my website link here:

melissaengeseth.stampinup.net

Fun, fun, fun!!

Happy, inky crafting to you all!

Melissa and HAnnah


Yay!! New Stampin Up Catalog is ready to go!!

I am super excited about the newest Stampin Up! catalog. And what crafter wouldn’t be?? It is so much awesome contained in paperback goodness. I am obsessed with  much of it. I won’t lie, there’s a few items that just aren’t my cup of tea, but, those are few and far between.

I’m enamored by the copper accents; foiling on papers and embossing powder. But, I’ve always loved copper!

Beyond that, I think I need everything…everything on page 77!  I need ALL THE THINGS!!

I would love to stay and chat, but, I need to go drool over the catalog yet more!

If you’d like to check out the new catalog online, check it out on my website:

melissaengeseth.stampinup.net

And if you’d like to watch a walk through of the catalog, this’ll go live at 3 am my time.